...
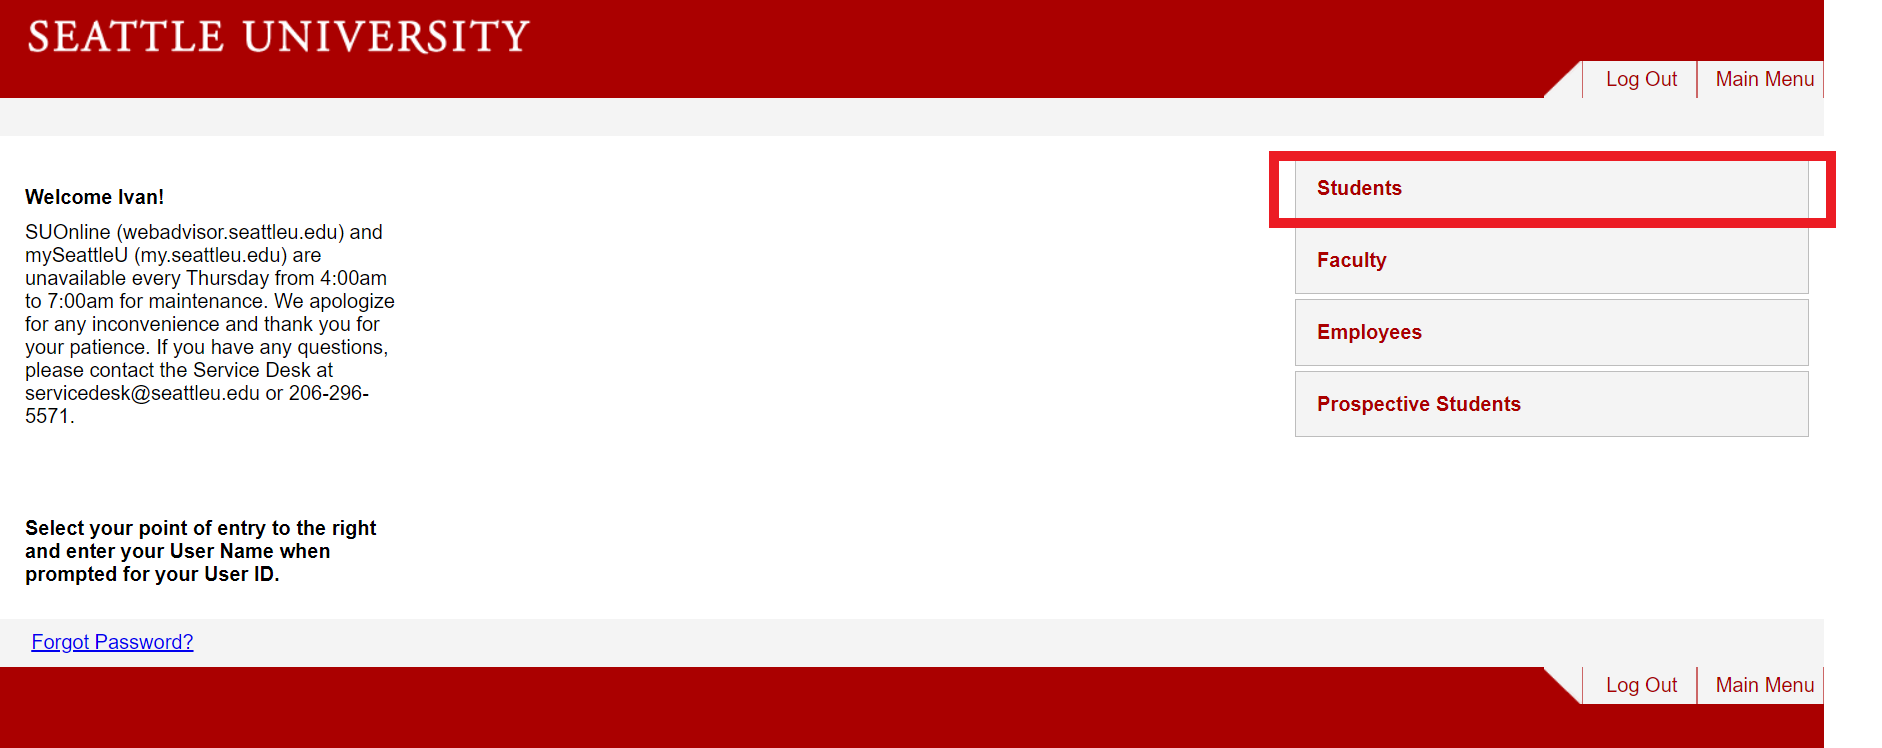
Log in to SU Online
Navigate to the Students menu
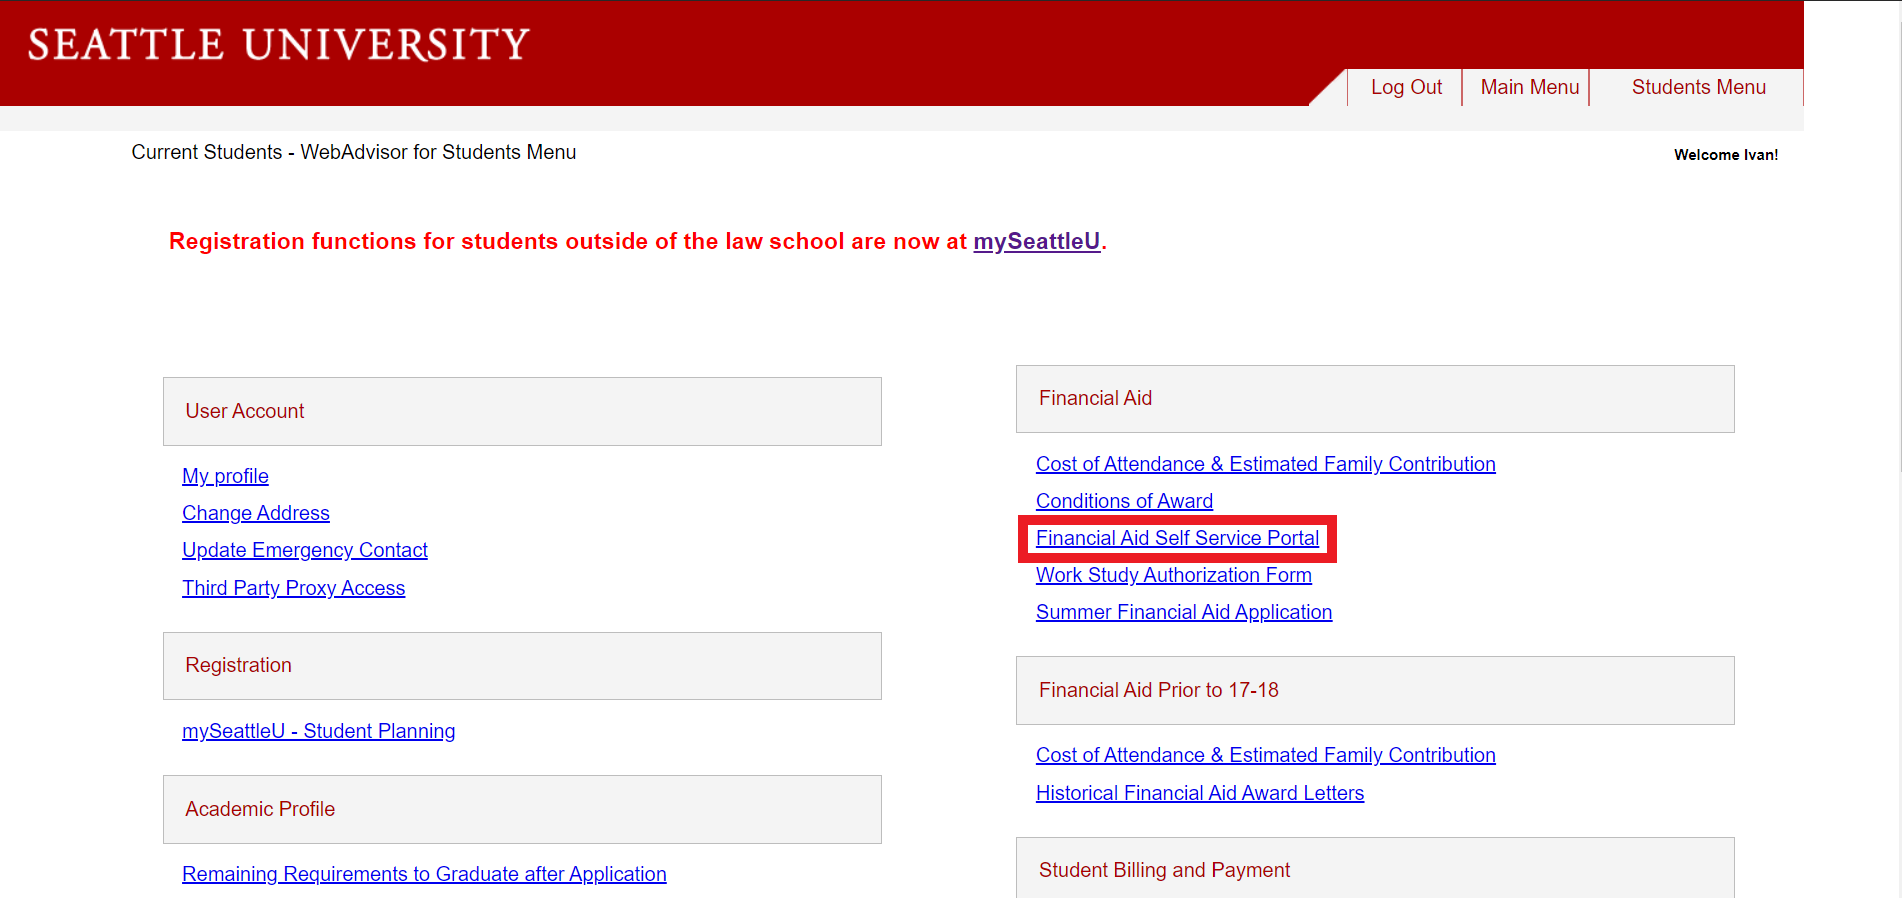
Under Financial Aid, select Financial Aid Self Service Portal
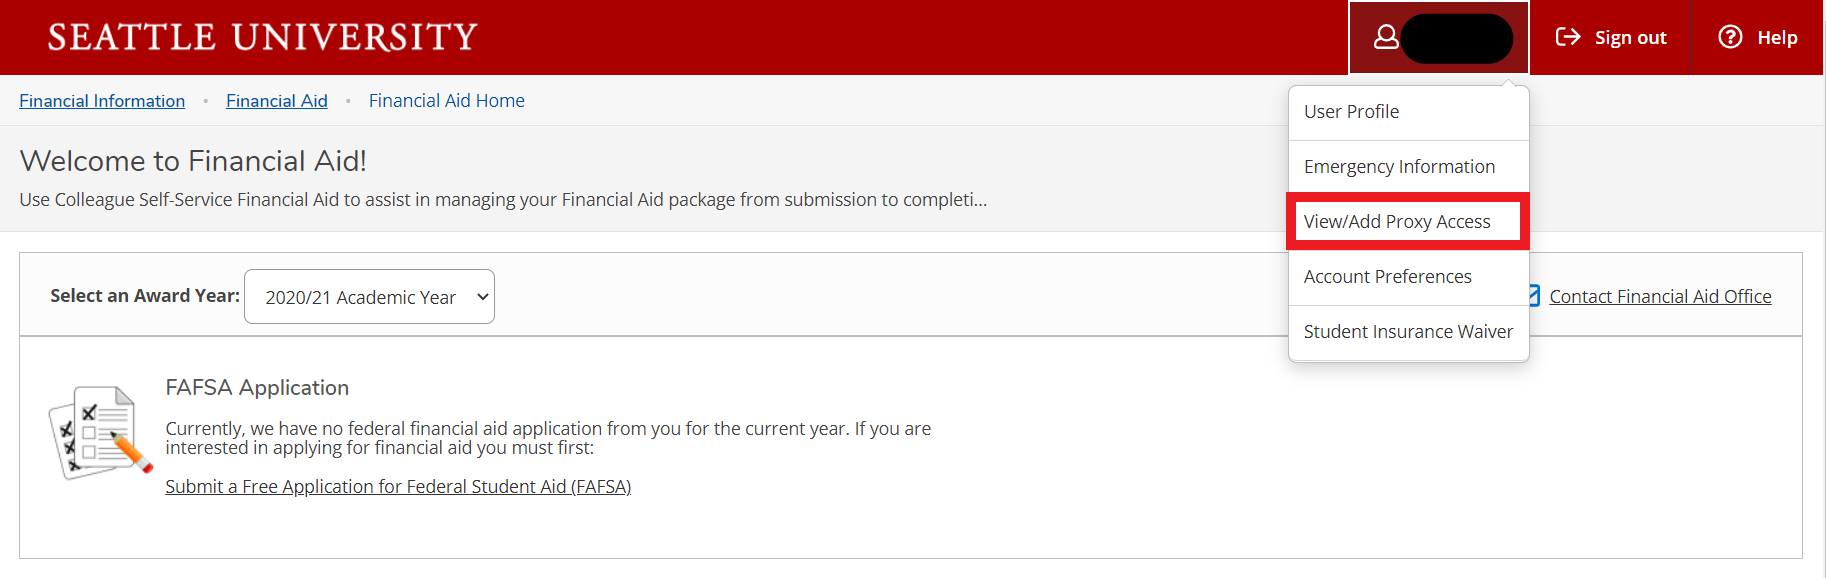
Select your username at the top right of the screen, and then View/Add Proxy Access from the dropdown menu
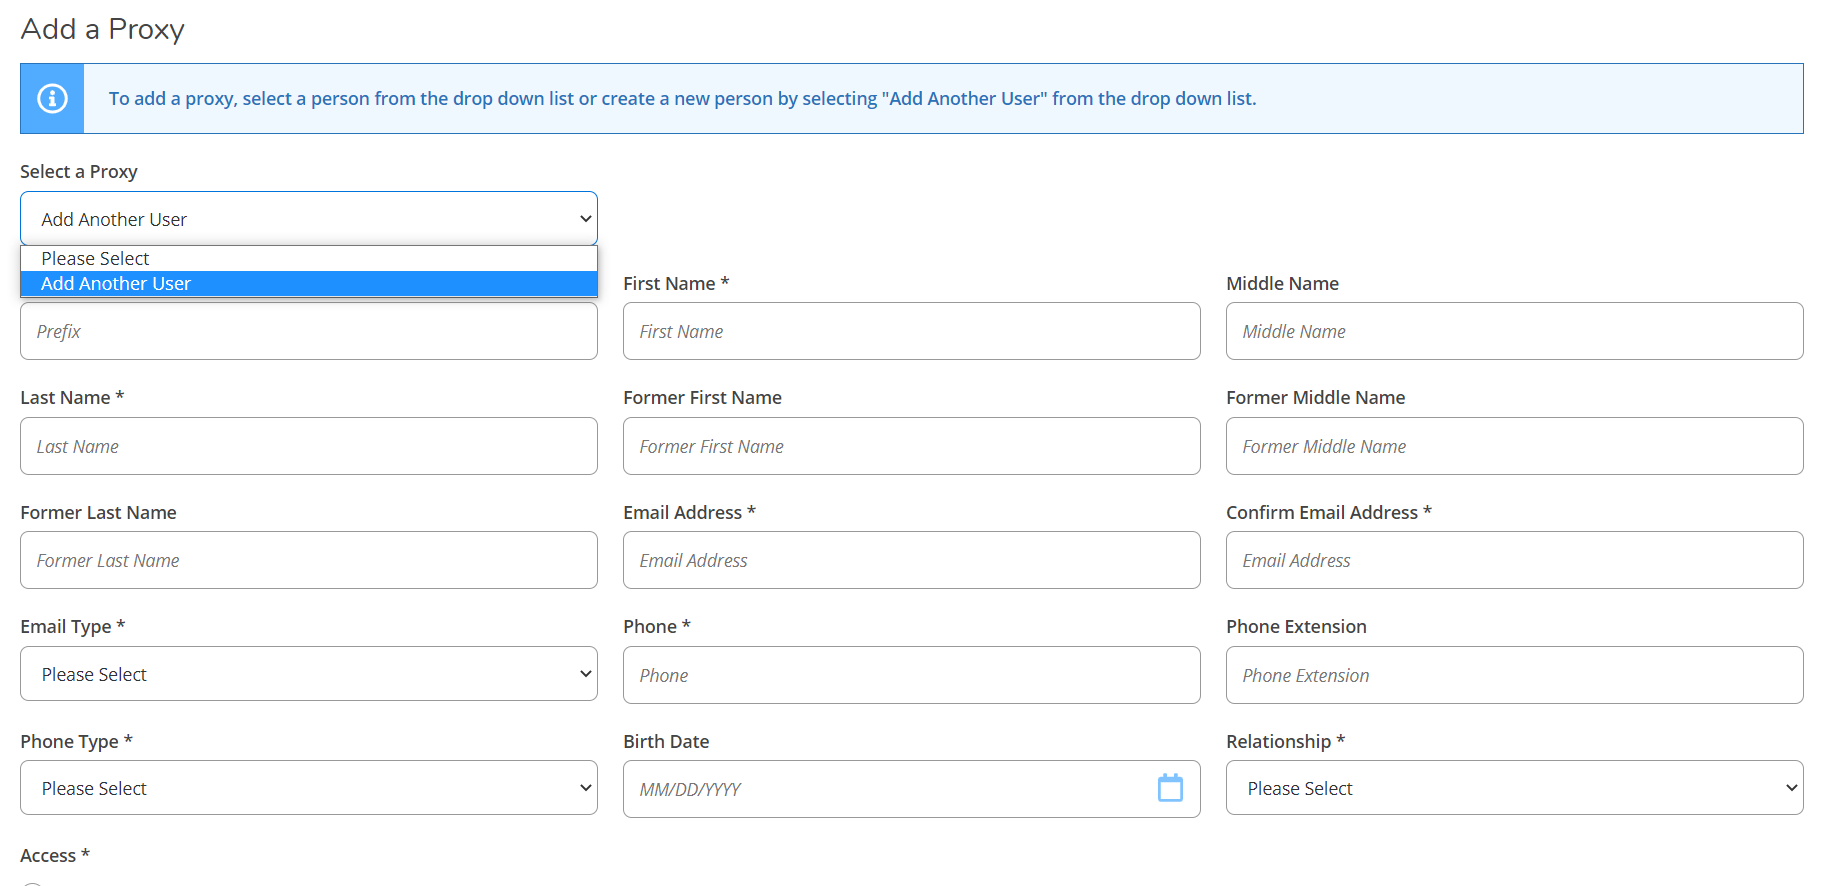
Follow the directions on the screen to “add a proxy,” making sure to choose the types of access you wish to grant
Read the disclosure agreement and select the box if you agree to the terms

Click Save
The person designated as a Proxy for financial aid information will receive two emails – one with instructions on how to complete the set-up process and another with a temporary password. If speaking with Seattle University about your financial aid information, they will be required to provide your Seattle University ID number as a security measure.
...
Log in to SU Online
Navigate to the Students menu
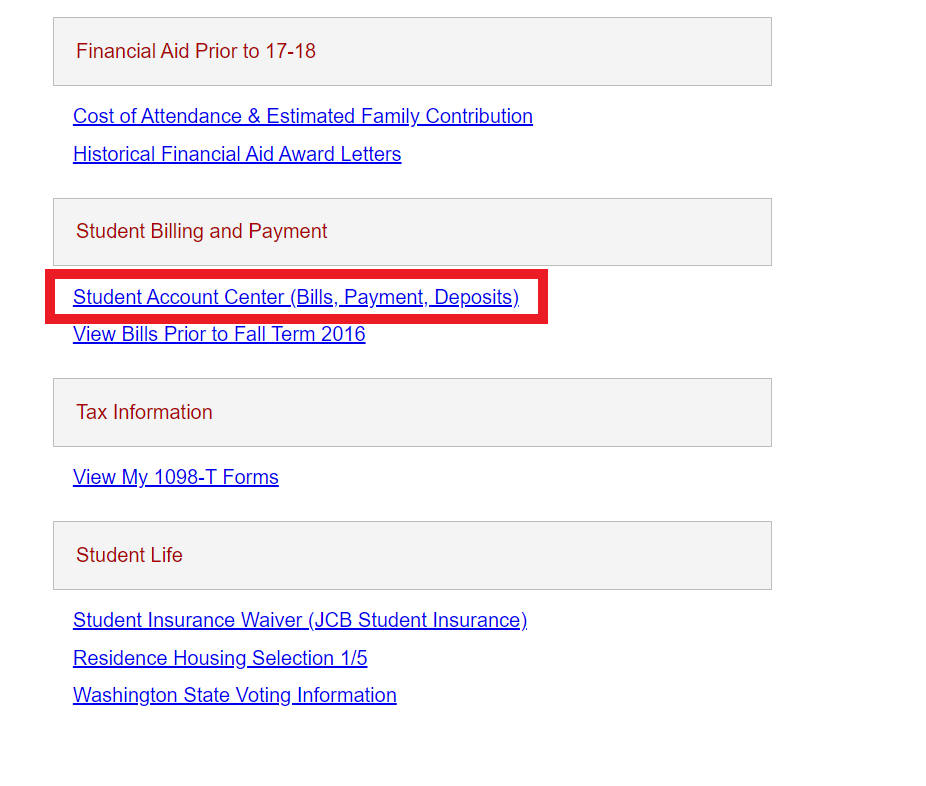
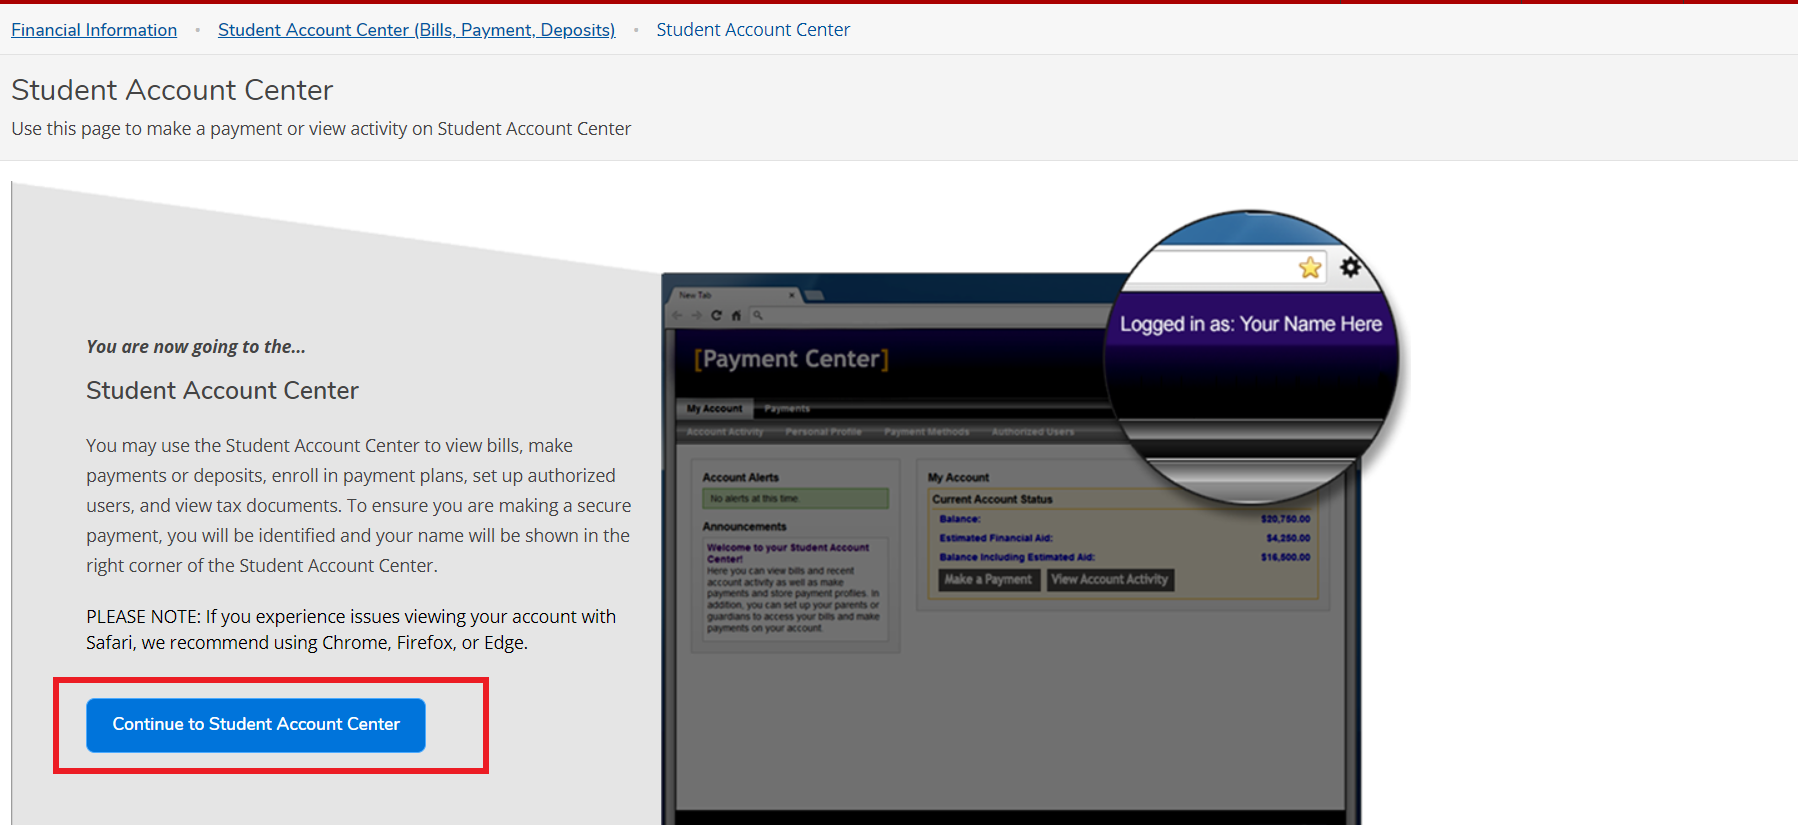
Under Student Billing and Payment, select Student Account Center (Bills, Payment, Deposits). The Student Account Center will open in a new tab
Select Authorized User, and follow the instructions to add a Proxy. If successful, the next screen will show a permission summary confirmation


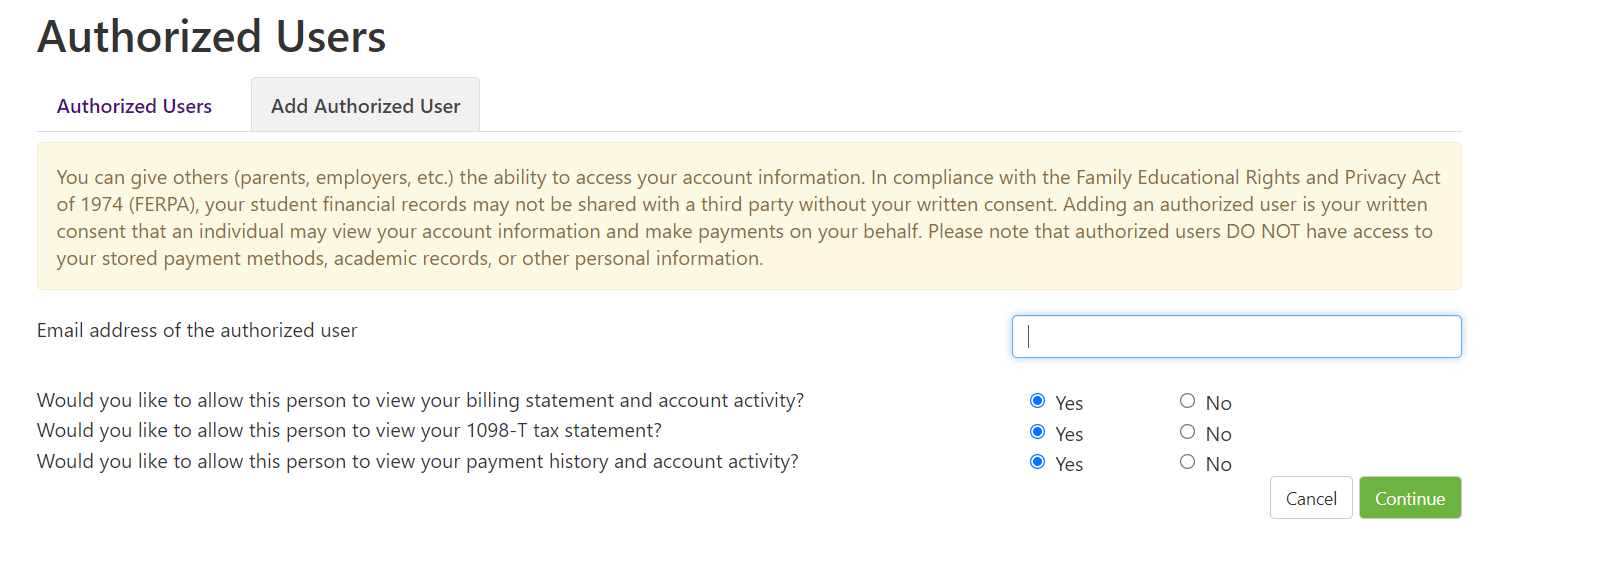
The person designated as an authorized user for the Student Account Center will immediately receive two emails – one with a user name and another with a temporary password.
...