Step-by-step
Quicklinks
Requirements
Must be an Administrator on your device
Must be connected to the SU-secure wireless, SU wired network, or Virtual Desktop
Printing from a Personal Mac
Install Print Driver
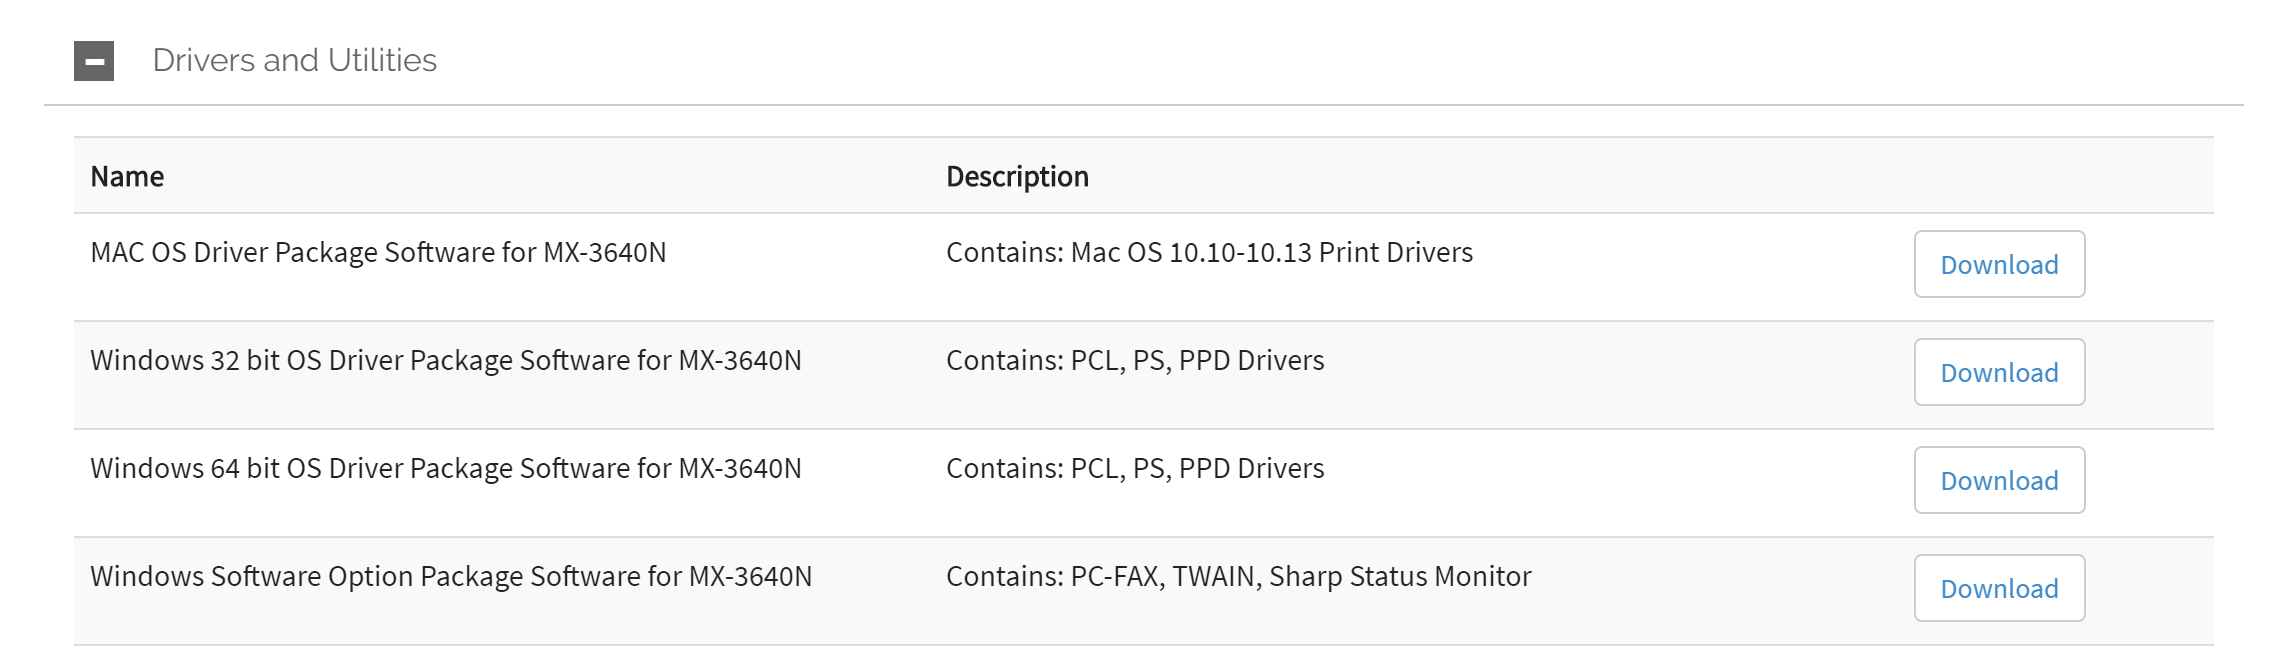
Visit http://sharpusa.com/CustomerSupport/ProductDownloads.aspx.
Fill out the search fields with the following:
Product Category: MFPs
Product: MX-3640N
File Type: Drivers and Utilities
Download the file labeled MAC OS Driver Package Software for MX-3640N.
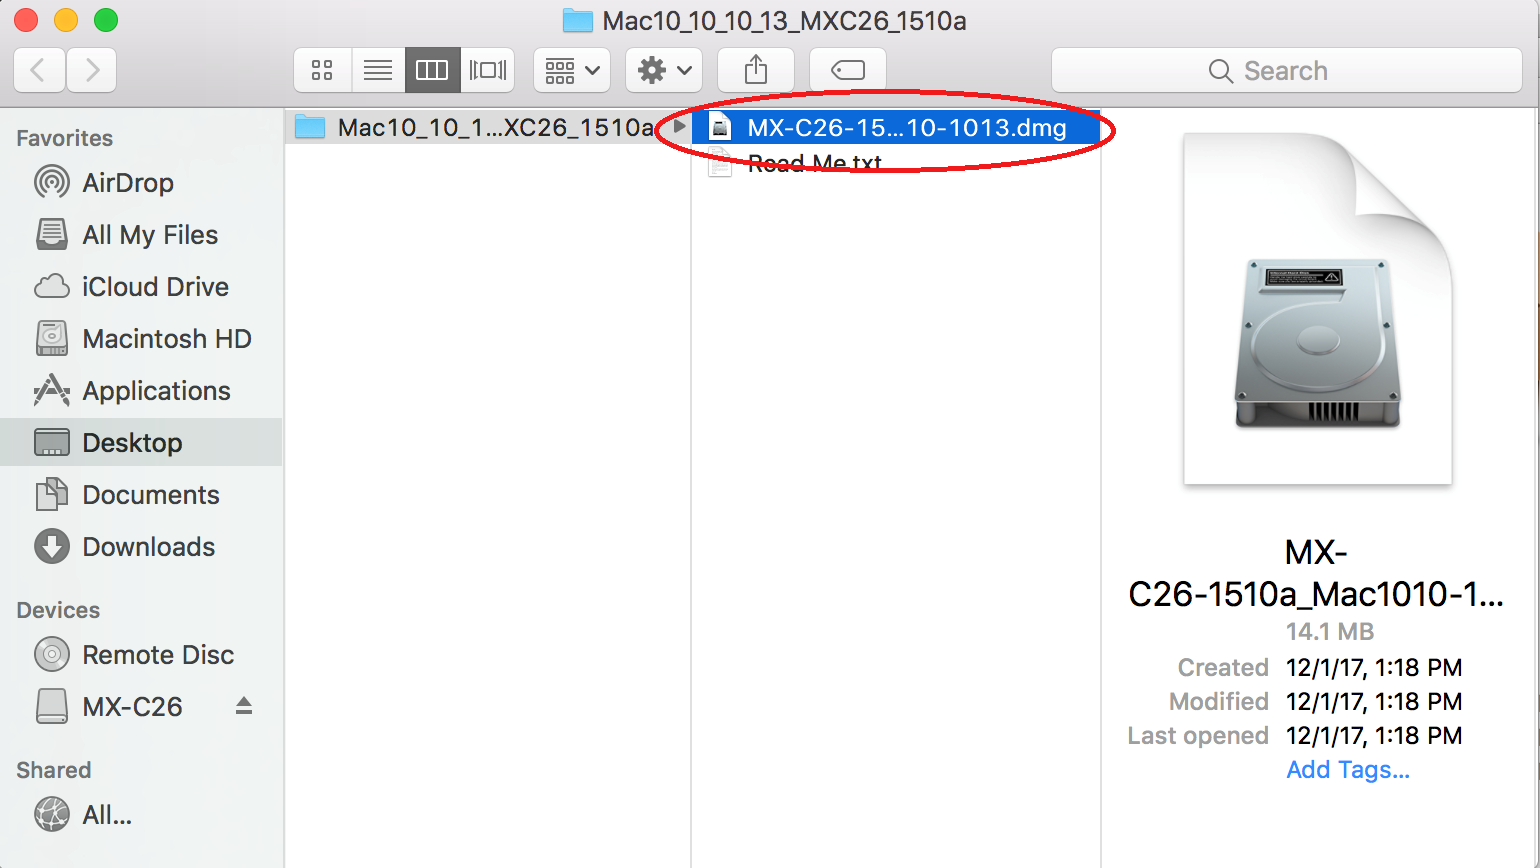
Open the file and double-click the installation software.
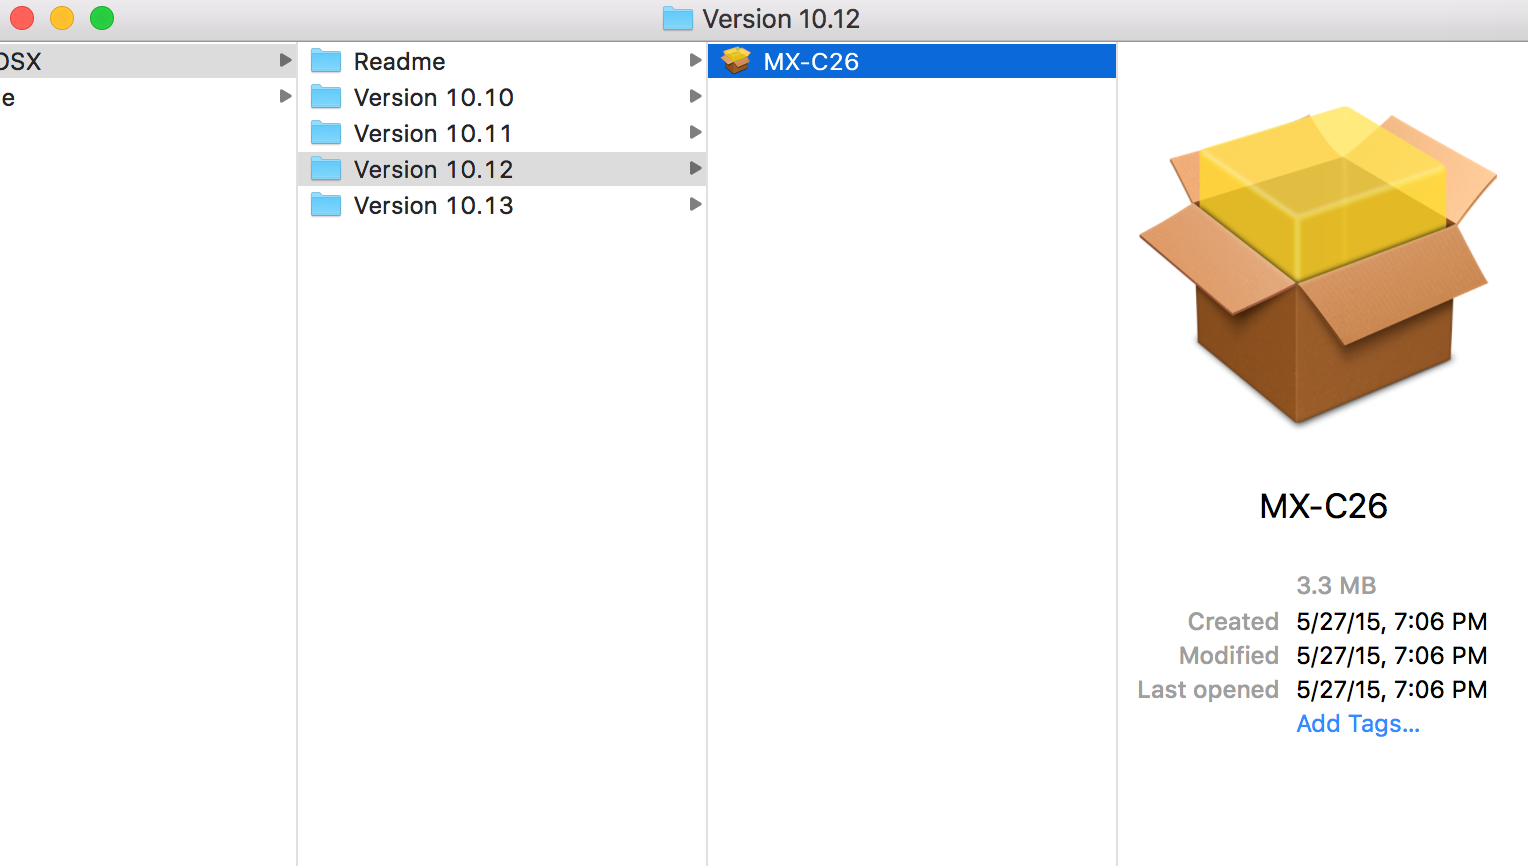
From the options select your Mac operating version number and double click the installer.
Create Printer Object
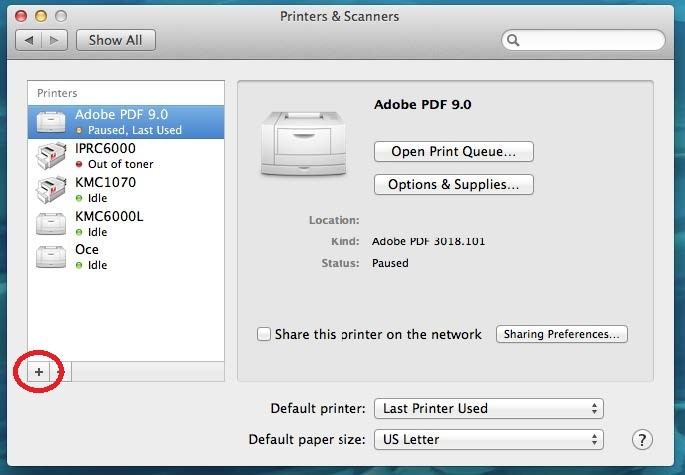
Open your System Preferences and select Printers & Scanners.
Click the plus sign (+) to add a new printer.
Go to Advanced and in the next window, fill out the following:
Type: Windows printer via spools
Device: Another Device
URL: smb://oit-prt-print/su-print-queue
Use: Use the drop down menu to find SHARP MX-3640N
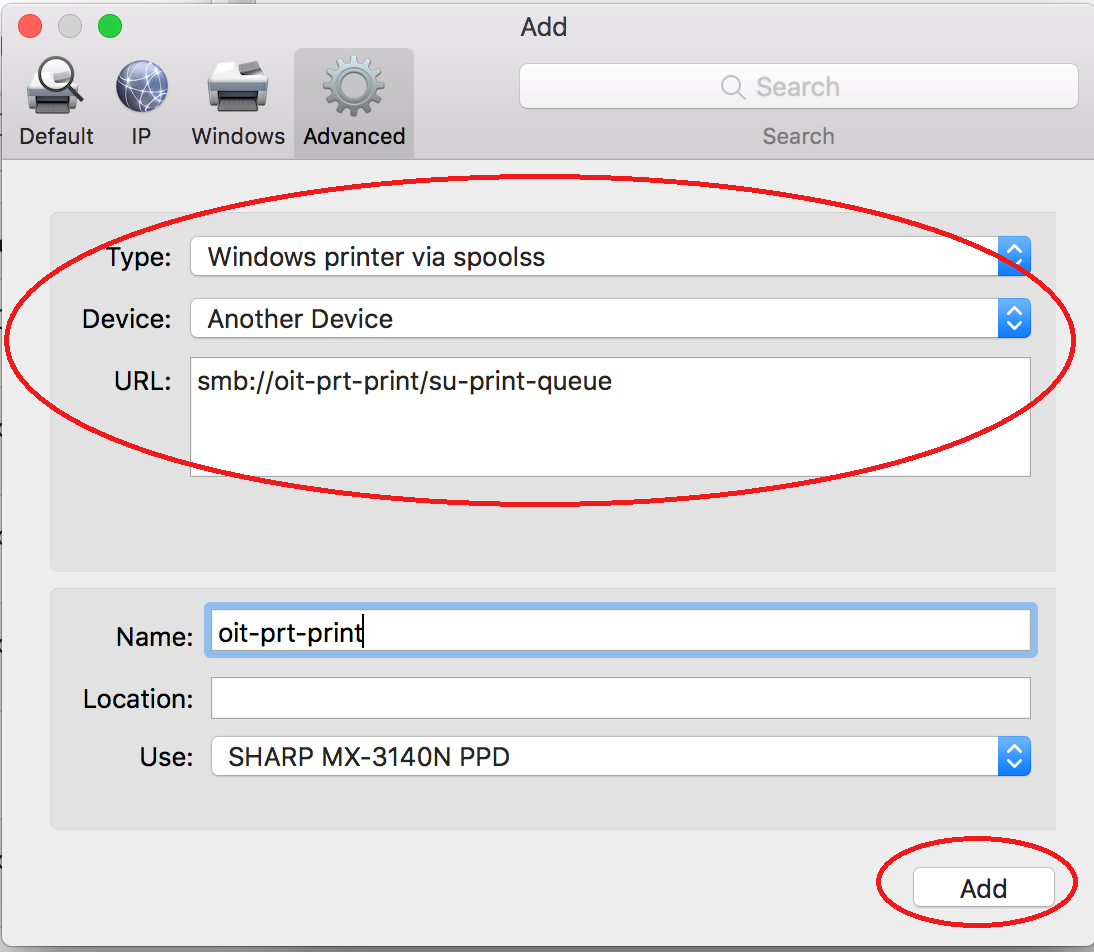
The printer name and location are optional fields.
Note: If you do not see the Advanced icon in your dialog box, see the following instructions to add it.
Add the Advanced Icon on a Mac
In System Preferences > Printers & Scanners, click the plus sign (+) to add a new printer.
Hover over Default and right click. Select Customize Toolbar from the options.
Drag the Advanced button into the toolbar and select Done.
Click Add.
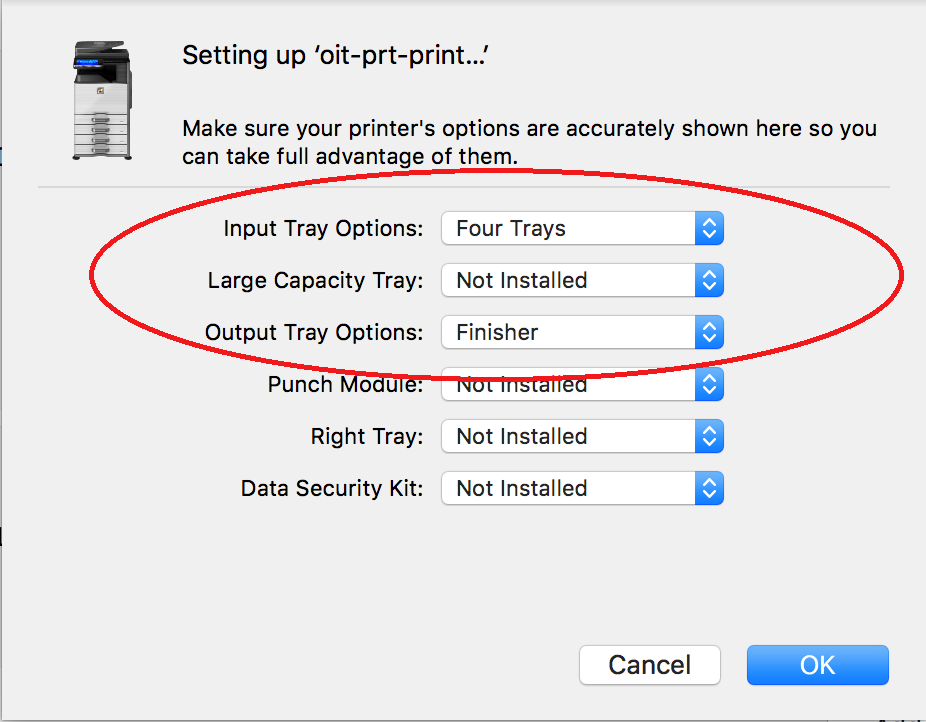
Choose the device options in the following dialog box and click OK:
Input Tray Options: Four Trays
Output Tray Options: Finisher
Install PaperCut
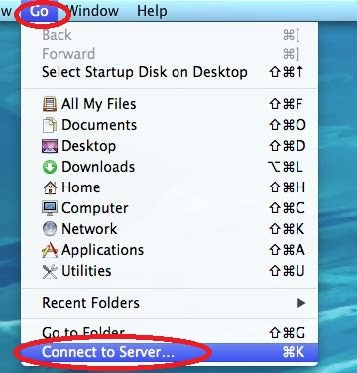
In the home screen toolbar, select Go > Connect to Server.
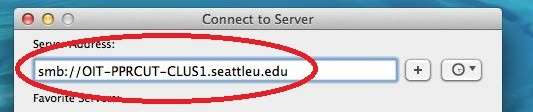
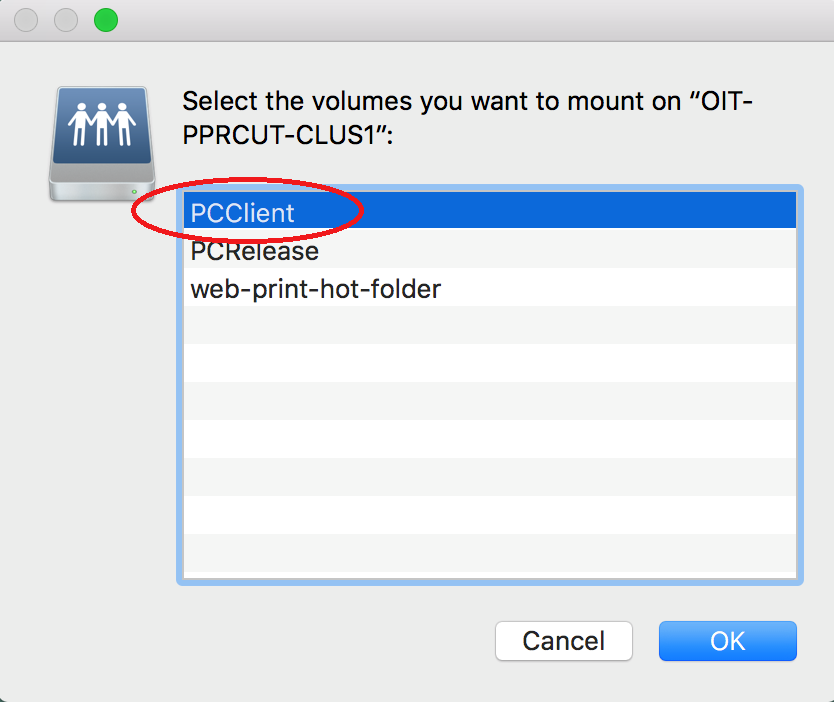
Enter smb://oit-pprcut-clus1.seattleu.edu in the Server Address field. If prompted, enter your Seattle University username and password.
Select PCClient and click OK.
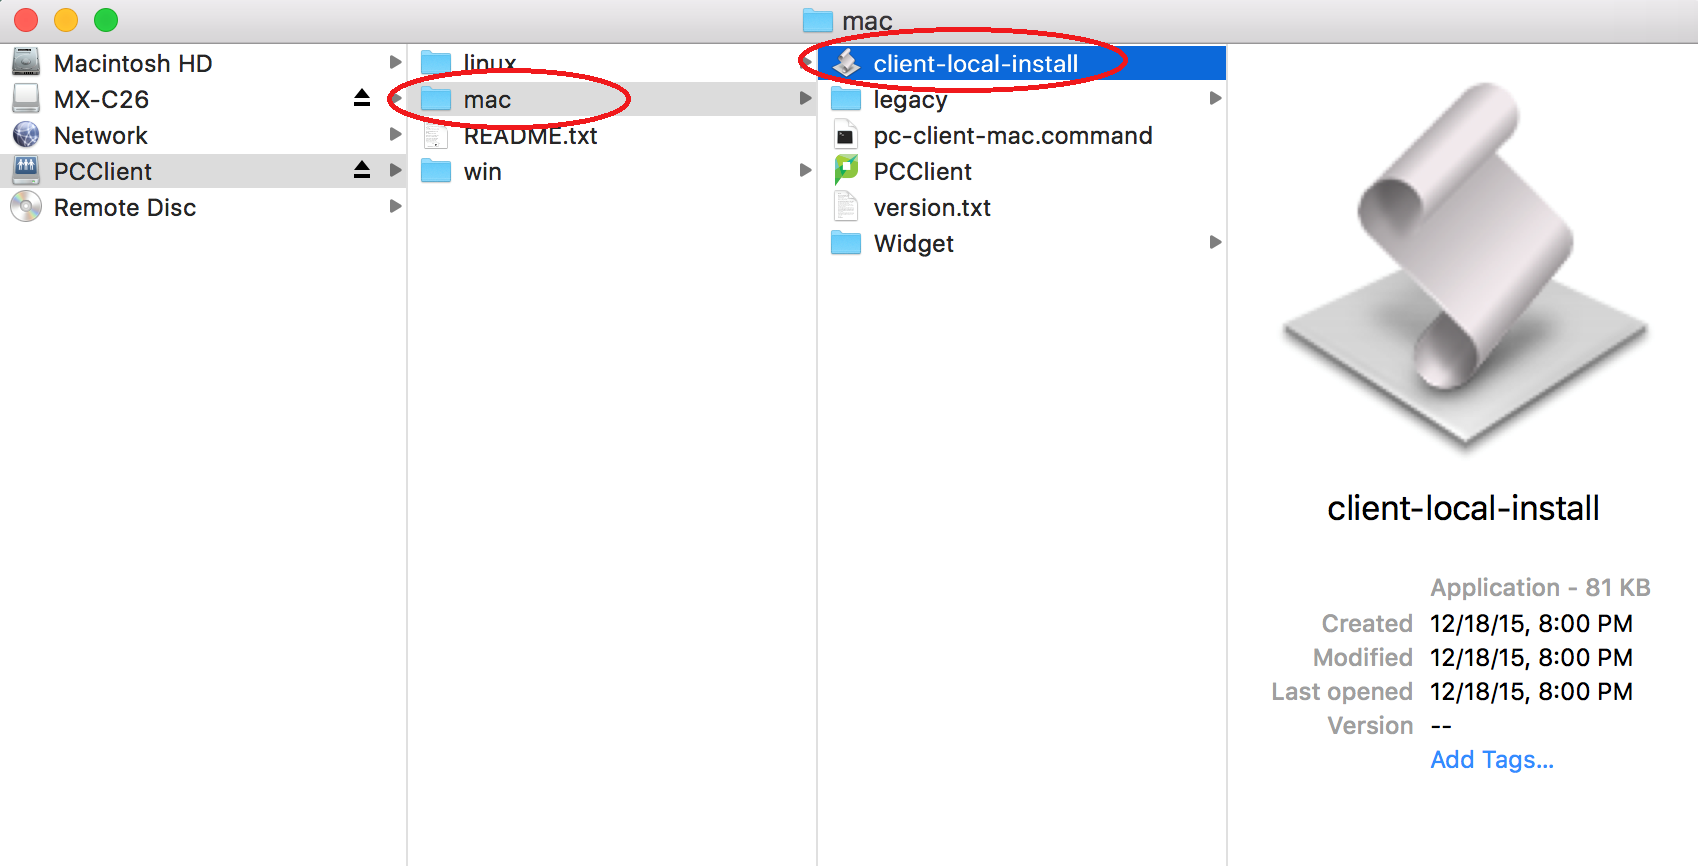
In the Mac folder, double-click the client-local-install and select Yes in the dialog box.
Note: macOS Catalina users: if client-local-install script does not run successfully
The client-local-install script to install the macOS client will no longer work on macOS Catalina, since it is still 32-bit.
The workaround, and much simpler way to install the macOS client is to copy the PCClient.app from the server, to the local /Applications folder - as you would do with other macOS apps. The PCClient.app will then run successfully.
Print Your Document
Select Ctrl + P on a document to test.
When prompted, enter your Seattle University username and password and choose a budget (personal or department).
Follow the usual steps at SU Managed Printing - SU Print Queue.
Printing from a Personal PC
Requirements
Must be an Administrator on your device
Must be connected to the SU-secure wireless or SU wired network
Install the Print Driver
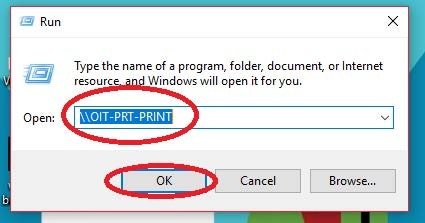
Right-click on the Windows Start button and select Run.

Enter \\OIT-PRT-PRINT and select OK.
If prompted, enter your Seattle U credentials in the following format:
Seattleu\username
Password
Select the box to remember your password
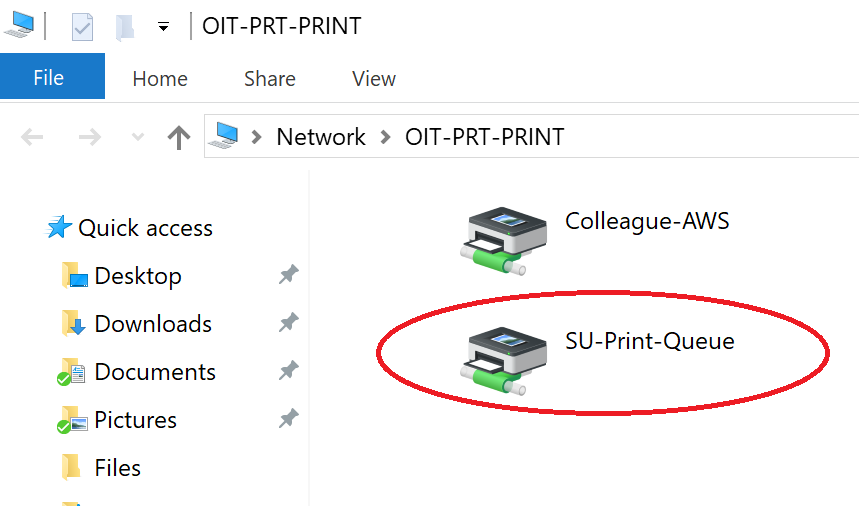
In the next window, double-click on the SU-Print-Queue printer icon to start the installation.
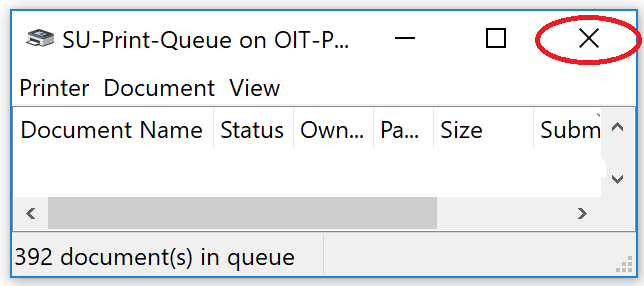
Once installed, the SU Print Queue dialogue box will appear. Close the queue and continue to the PaperCut installation instructions.
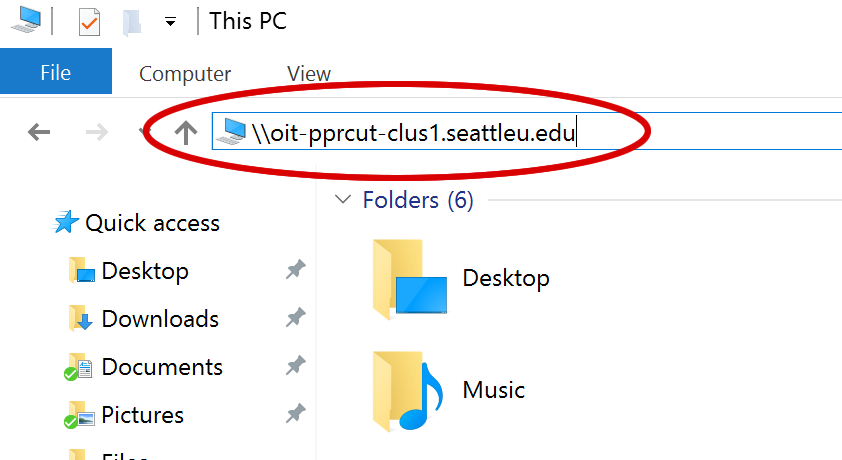
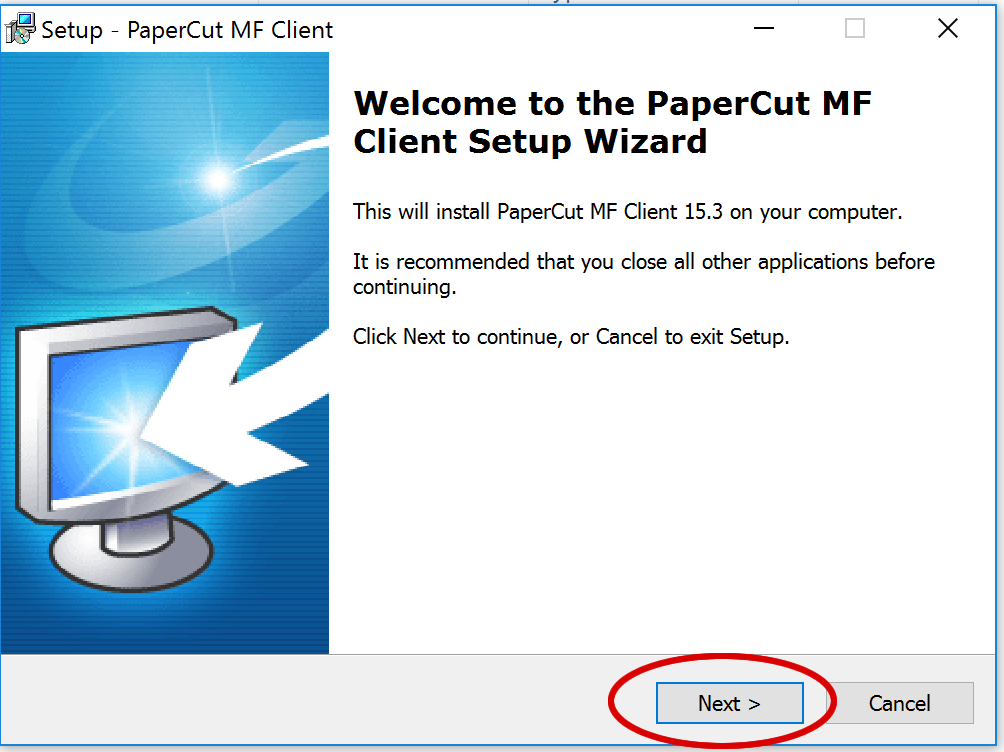
Install PaperCut
Open File Explorer and enter \\oit-pprcut-clus1.seattleu.edu at the top.
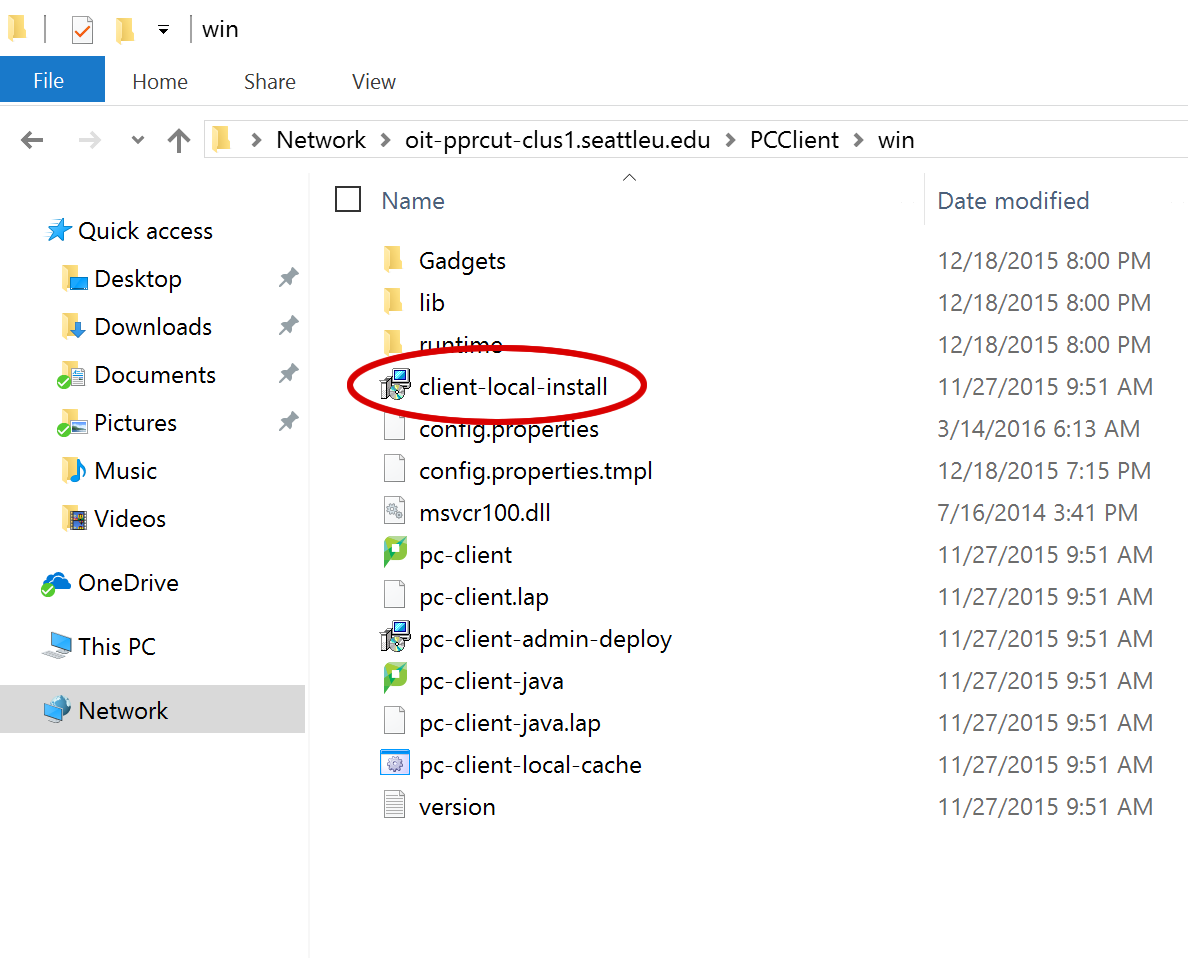
Open the PCClient folder > win > client-local-install.
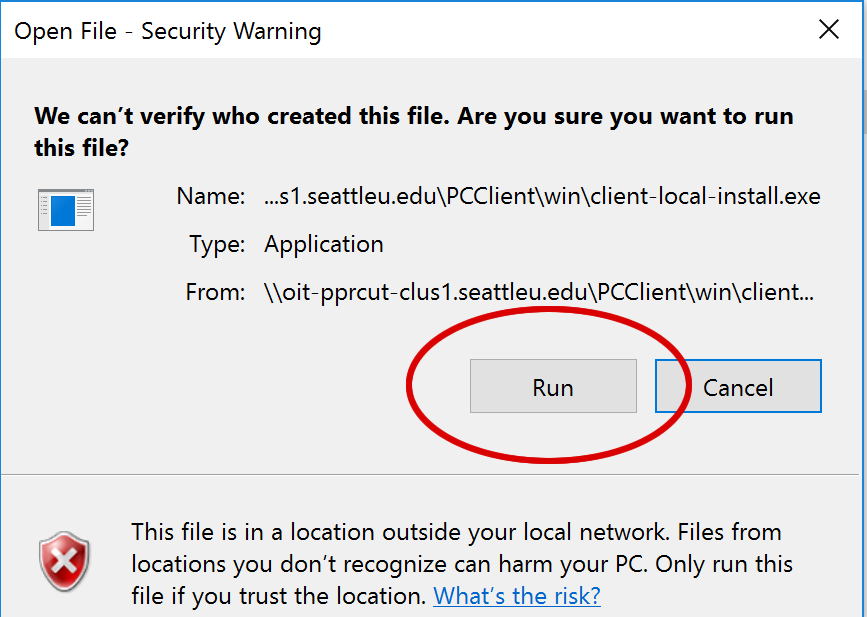
Click Run and select Next in the Setup Wizard.
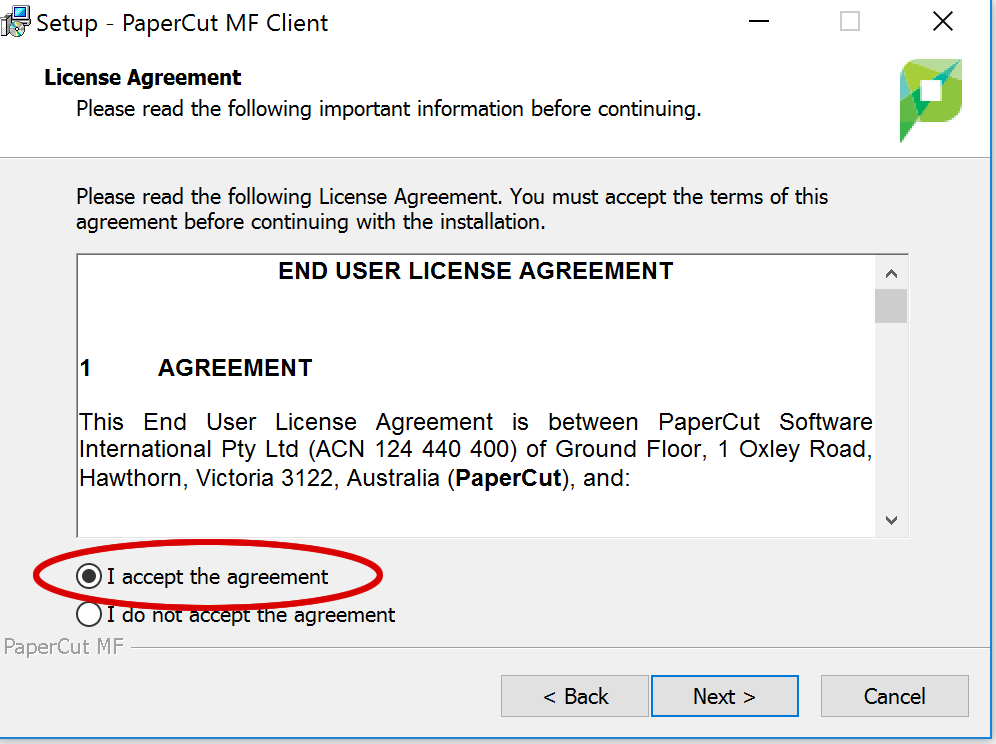
Accept the Terms and Agreements and select Next.
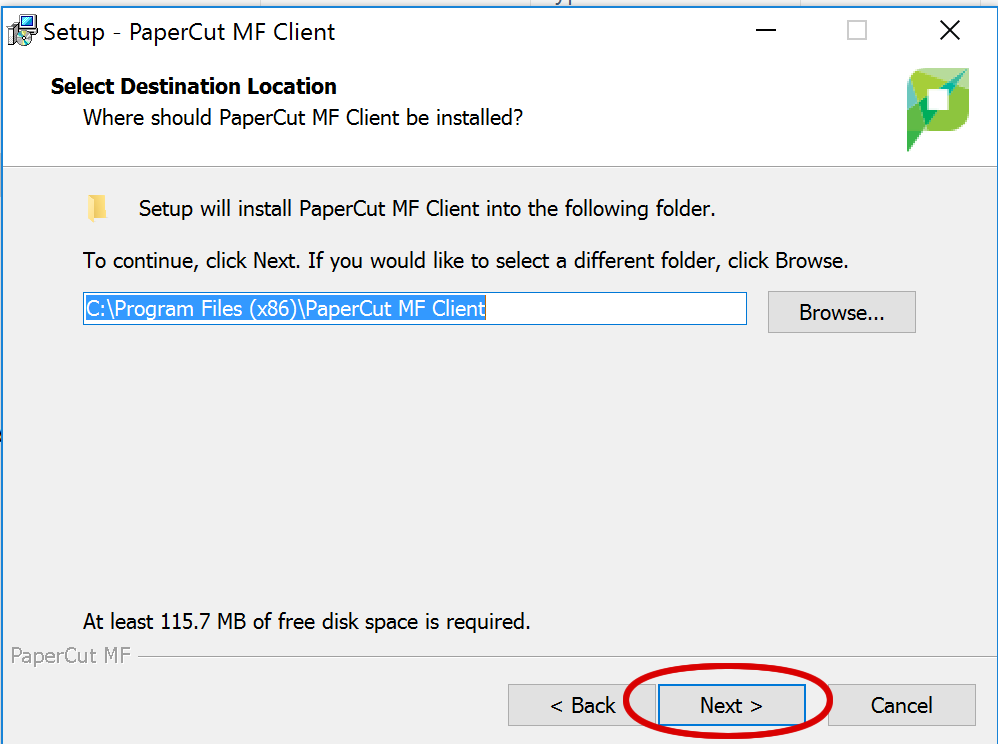
The destination will automatically generate. Select Next > Finish. If prompted, enter your Seattle University username and password.

Print Your Document
Select Ctrl + P on a document to test.
When prompted enter your Seattle University username and password and choose an account (personal or department).
Follow the usual steps at SU Managed Printing - SU Print Queue.
Need additional help? Submit a ticket in our new portal here: IT Service Desk Help Center