Live Transcription is only available on version 5.5.0 or higher.
Zoom offers the ability to provide live automatic speech recognition (ASR) transcripts in real time for meetings and webinars. By default, the option is not enabled, but Zoom hosts who would find the feature useful for their participants can enable it through their Zoom account settings.
Once enabled, the feature provides the ability to show in-session ASR transcriptions of all spoken content, based on the session audio. The transcriptions appear during the meeting or webinar in a side panel visible to all participants.
Because this service creates machine-generated transcriptions, their accuracy will not be perfect. Most ASR transcription results in approximately 70-80% accuracy.
If you are in need of a better accommodation, Disability Services may be able to provide more options: ds@seattleu.edu
Enable Live Transcription in Zoom Settings
This is an opt-in feature for all SU Zoom accounts. Users must be on version 5.5.0 or higher to activate/use this feature.
The Zoom meeting host must enable this feature in their account settings in order for the live transcription service to be available for all meeting participants. Alternative hosts and co-hosts should also enable this setting if desired for the meeting.
Log in at https://seattleu.zoom.us
Click on Settings.

Click the In Meeting (Advanced) option, or scroll all the way down to that section.

Underneath the enabled Closed Captioning option, check the box to enable live transcription service to show transcription on the side panel in-meeting. Click the Save button.

The Live Transcription service is available for use.
To Activate Live Transcription in a Zoom Meeting
Once the Zoom meeting begins, the host will need to Enable the live transcription service to be active for each meeting.
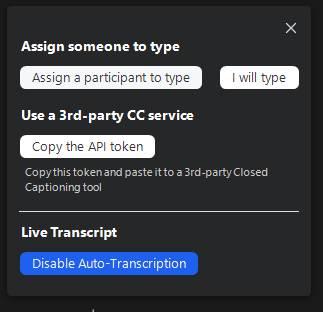
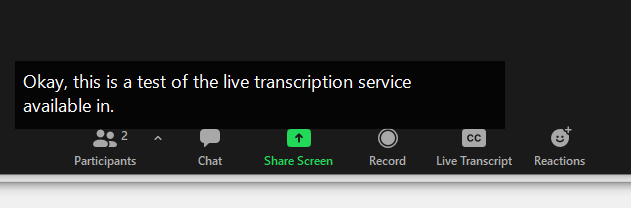
As the meeting host, click the “CC” Live Transcript button at the bottom of your Zoom meeting. Then click the Enable Auto-Transcription button at the bottom of the menu.

Once activated, the button will turn blue and switch to a “Disable…” option. The live transcription service is now available in your meeting.
The participant will be able to view the subtitles as an overlay on the meeting screen.
They may adjust the settings as needed by clicking on the “CC” live transcription button and selecting the Subtitle Settings option.
Participants may also choose to Hide Subtitle if they do not need it and find it distracting.

Participants may also choose to View Full Transcript by selecting that option. The full transcript will pop up in a side-panel window in the Zoom meeting, much like the Chat or Participant side-panel.
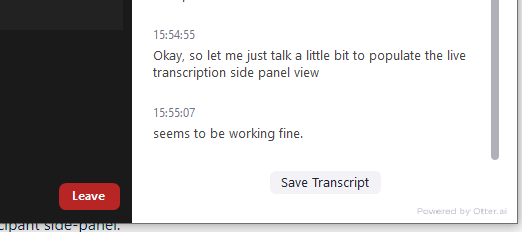
Participants must click the Save Transcript button in order to save the transcript as a text file on their computer before the meeting ends. The Save Transcript button may be clicked at any time, and a text file will capture the transcript up to that point.
Need additional help? Submit a ticket in our new portal here: IT Service Desk Help Center